Home
About
Patient Services
Care & Tips
Patient Library
Examples
Patients Speak
Frequently Asked Questions
Your Special Day
Patient Forms
Fees
Map & Directions
Contact

Examples


Here are examples of several of types of procedures that we perform. A brief description accompanies each before and after photo.


Case 1
This is a very typical case of old amalgam fillings. They are already cracked and have leaking fractures going toward the inner part of the tooth. Please note the unaestethic appearance of the three pieces.


Old amalgam fillings have already been removed, and two layers of adhesive have been set into the cavity. Then we set the composite bonded to enamel and reshaped it in order to have a natural dental anatomy. Compare the new look of these pieces. This procedure only took one appointment.


Go to top


Case 2
Once again, we have several old amalgam fillings, but in this case, we are going to use inlay and onlay porcelain crowns. These fillings are made by a highly skilled lab technician. The difference between the need for inlays and onlays depends on the amount of missing tooth structure. Onlay crowns are set in wider cavities in which we need to rebuild and protect cuspids.


In this case, we decided to use onlay porcelain crowns in the two pieces on the patient’s left side and inlay porcelain in the three pieces on the patient’s right side. Please note how perfectly the color blends and how the edge of the crown becomes invisible.


Go to top


Case 3
In this case, there is a gap between the top central teeth. The patient's left tooth has a lateral wall broken, and the right tooth has a fracture on the incisal edge. The best choice to resolve these issues was two porcelain laminate veneers.


Please note how porcelain veneers match and blend with the collar (the portion near the gum) of each tooth.


Go to top


Case 4
This patient had a recent car accident and broke two lower frontal teeth, central and lateral. Both fractures affected the pulp (the vital part within the tooth). For this reason, a root canal treatment was needed first.


After the root canal treatment, we attached two porcelain pins inside each root canal. Porcelain pins were used for their high compatibility with porcelain crowns, ensuring a natural translucency.


Impressions were taken and sent to the lab for the creation of the custom crowns. During the next appointment with the patient, we cemented the two porcelain crowns. Maximum aesthetics were needed due to the highly visible location of the affected teeth.


Go to top


Case 5
Patient came to our office with only six dental pieces in the upper maxilla. The pieces were covered with completely worn down metal-acrylic crowns, which evidently and desperately needed to be changed. No posterior (rear) teeth existed.

In the lower maxilla, the situation was no better — a lot of missing teeth and the remaining ones were in bad shape. As you can see, there was a closed bite occlusion, also called an "overbite", meaning that the upper teeth completely covered the lower teeth when the patient bit down.


Another view of the existing damage can be seen in this photo, with metal all over and deep red swollen gums.


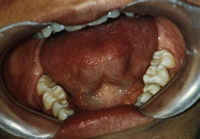
No extraction was performed. 
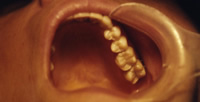
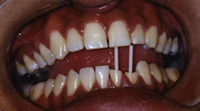
Instead we decided to preserve every piece. After root canal treatments were done, we reinforced the remaining tooth structure, installing special screws into the root canal of the tooth. Then 
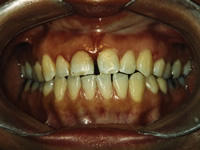
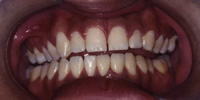
full crowns were cemented, 6 in the upper and 5 in the lower maxilla. Removable bridges provided 8 teeth in the upper maxilla and 7 in the lower. 
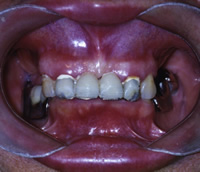
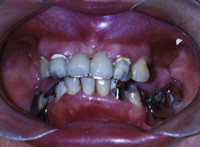
Instead of metal clamps for the removable bridges, we chose precision clips so that the patient's smile would be clean and beautiful. No metal would be shown. The only clamp we let remain was in the lower left (in the rear), which would not be evident to others.

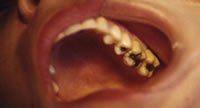
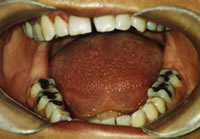
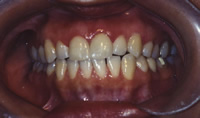
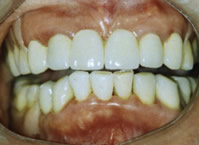
Please note how the new occlusion allows the patient to bite with better function 
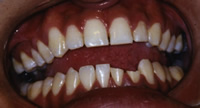
and more comfort. Aesthetic improvement was also achieved. This photo was taken 8 years after the work was done, so you can see how durable these treatments actually are.


Go to top